.png)
Annual Report
Tips to creating a new annual report in Webflow.
Creating an Annual Report
The most efficient way to create an annual report is to duplicate an existing annual report and change out the information. You are able to create a fully custom annual report, but take into account the time and effort it would take to create a new one.
Tips
- Be careful as you adjust existing classes. If you change an existing class that is used across other annual reports, it will change all of those annual reports. If you are customizing the report's layout / colors, you will want to make sure that you duplicate the class before changing it.
- Regularly check the other annual reports to make sure you are not accidentally changing them.
- Create a backup before editing the CMS collections mentioned in this page.
- Give yourself plenty of time. It takes a lot of effort + time to create the annual report! Make sure to plan accordingly.
Step 1: Duplicate an Annual Report
You'll want to choose an annual report to duplicate, in this example we will be using the 2023 Annual Report.

You will want to make sure to update the page name, the slug, as well as the title tag (found below).

You will also want to update the Open Graph Image URL with an appropriate image.

The Open Graph image is the preview image you see when you share the webpage link on social media.
Lastly, save the page as a draft so that it will not be indexed by search engines until you are ready.

Step 2: Input New Information
The largest amount of work conducted for the annual report is gathering the information to input. You will want to work closely with faculty to gather this information. Once you have the information, you can start to input it into the report.
Step 3: Year In Review Section
The "Year in Review" section is controlled through a CMS called "Annual Report Events."
You will first want to create two new semesters in the CMS. So click on the COG icon and navigate to the semester dropdown field. This is where you add in the new semesters. Make sure to save the field, and save the collection.

Once you have added the new semesters, you have to change the filter on the "ar-timeline-collectionlist" element. Set the filter to the semester you have just created. The "Year in Review" section goes in chronological order, so the Fall semester comes before the Spring semester. Also, make sure that the sorting order is set to Oldest to Newest.

Step 4: Meet the Students
This section is controlled through the "Student Profiles" CMS collection. You will need to set the filter of the collection list to show the relevant cohort.
Step 5: Student Internships and Work
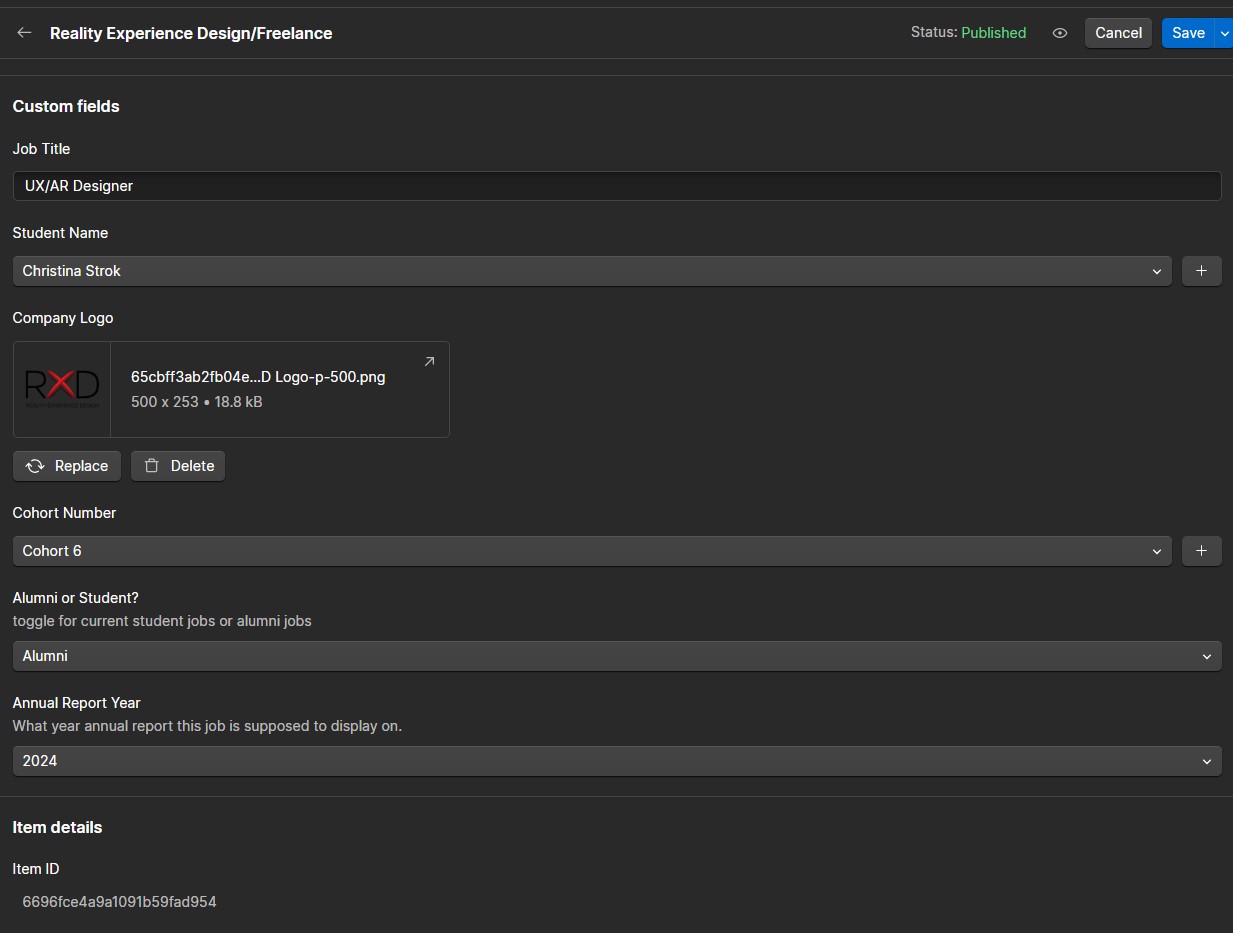
This section is populated through a CMS collection called, "Jobs."
First, you want to add the year of the report to the collection settings.
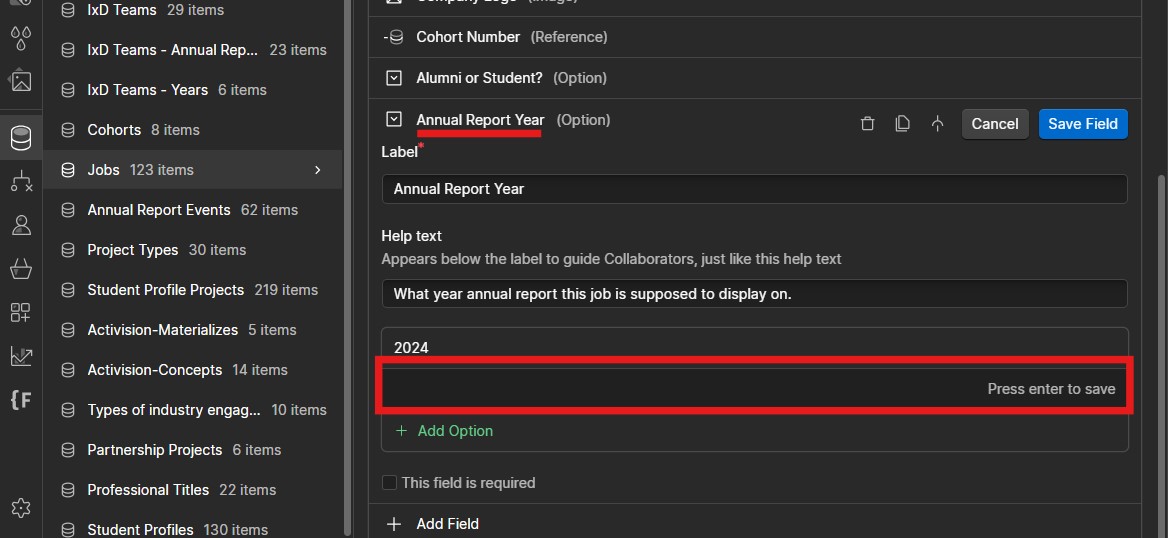
Once you've added the year, you can create new collection items and fill out the information requested. Make sure to set the year as the appropriate year.
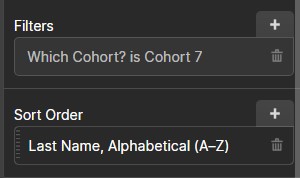
In the designer view, you will want to set the filters according to the cohort you want to show. Use the photo below as a reference.

Step 6: IxD Team
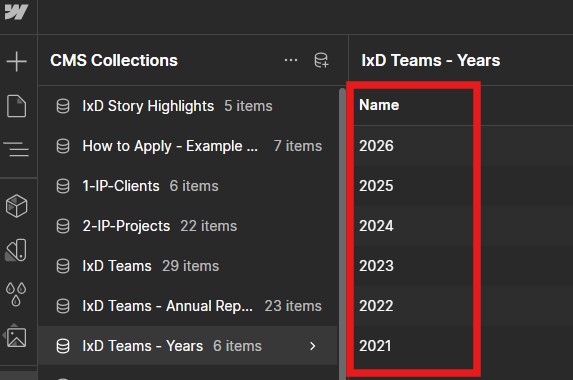
This section uses the "IxD Teams - Annual Reports" CMS to hold the member information as well as the "IxD Teams - Years" CMS collection that determines which annual report the members will show on.
You will need an updated list of the members of the IxD team. Based on this list you can update or add new members as needed.
First, create the appropriate year in the "IxD Teams - Years" CMS collection.
Next, attach the appropriate years to each member. For example, if you are adding a member from the 2024 annual report to the 2025 annual report, add in the 2025 year the the "Years Active" input. Do not delete previous years.

You will then need to adjust the filter for the "ar-ixdteam-collection-item" by changing the previous year to the new appropriate year.
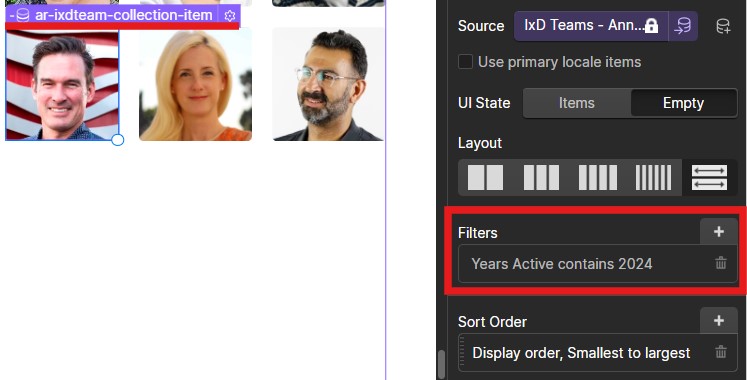
If you need to adjust the order the members display in, you can adjust the "Display order" input in the collection item.

Step 7: Alumni Today
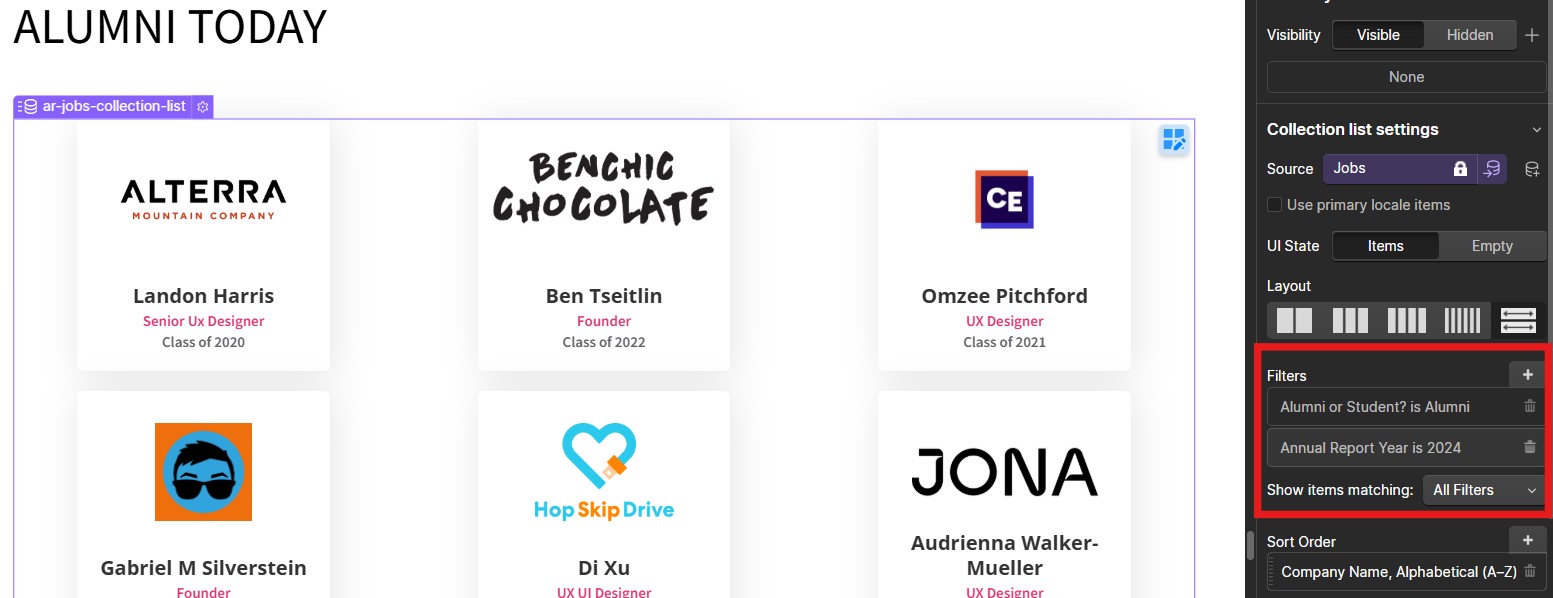
The Alumni Today section uses the "Jobs" CMS collection. You will want to add in new collection items and make sure you set the annual report year to the appropriate year. For example, if you're creating the 2025 report, add the year 2025 to the alumni collection items you create. You will also need to designate them as alumni.

You will then want to adjust the filter on the "ar-jobs-collection-list" element in the designer. Make sure to set the "Annual Report Year is ___" to the appropriate year.
Step 8: Check Mobile View + Publish!
Now that you've uploaded all of the information into the report, and are ready to go public, make sure that everything looks good in the mobile view.
You will also want to adjust the "News and Announcements Banner" learn more button to link to the new annual report.
